Return back to the Dynamics Hub 


 Return back to the Dynamics Hub
An unsubscribe option is required for emails that have a commercial purpose.
- Commercial purposes are for emails intended for external audiences outside of the CSUSM email, such as mailing lists, marketing emails, and optional communications. This is a requirement by law. The unsubscribe option is normally placed outside of the email body.
- Transactional purposes are when a communication is sent as a result of a transaction like purchasing or registration, or when the communication is not optional and is a required part of membership to a group.
Step 1: Open Your Email
- Start by opening the email where you need to add the unsubscribe option.
Step 2: Create Space for the Unsubscribe Block
- Hover near the bottom of your email body until you see a circle with a plus sign (+).
- Click the plus sign (+), and a blue widget will appear.
- Select the 1 column option.
- This creates a new section below your email body, specifically for the unsubscribe block.
Pro Tip: Adding this outside the main email body keeps it from distracting from your primary message while still being accessible at the bottom.

Step 3: Add the Unsubscribe Option
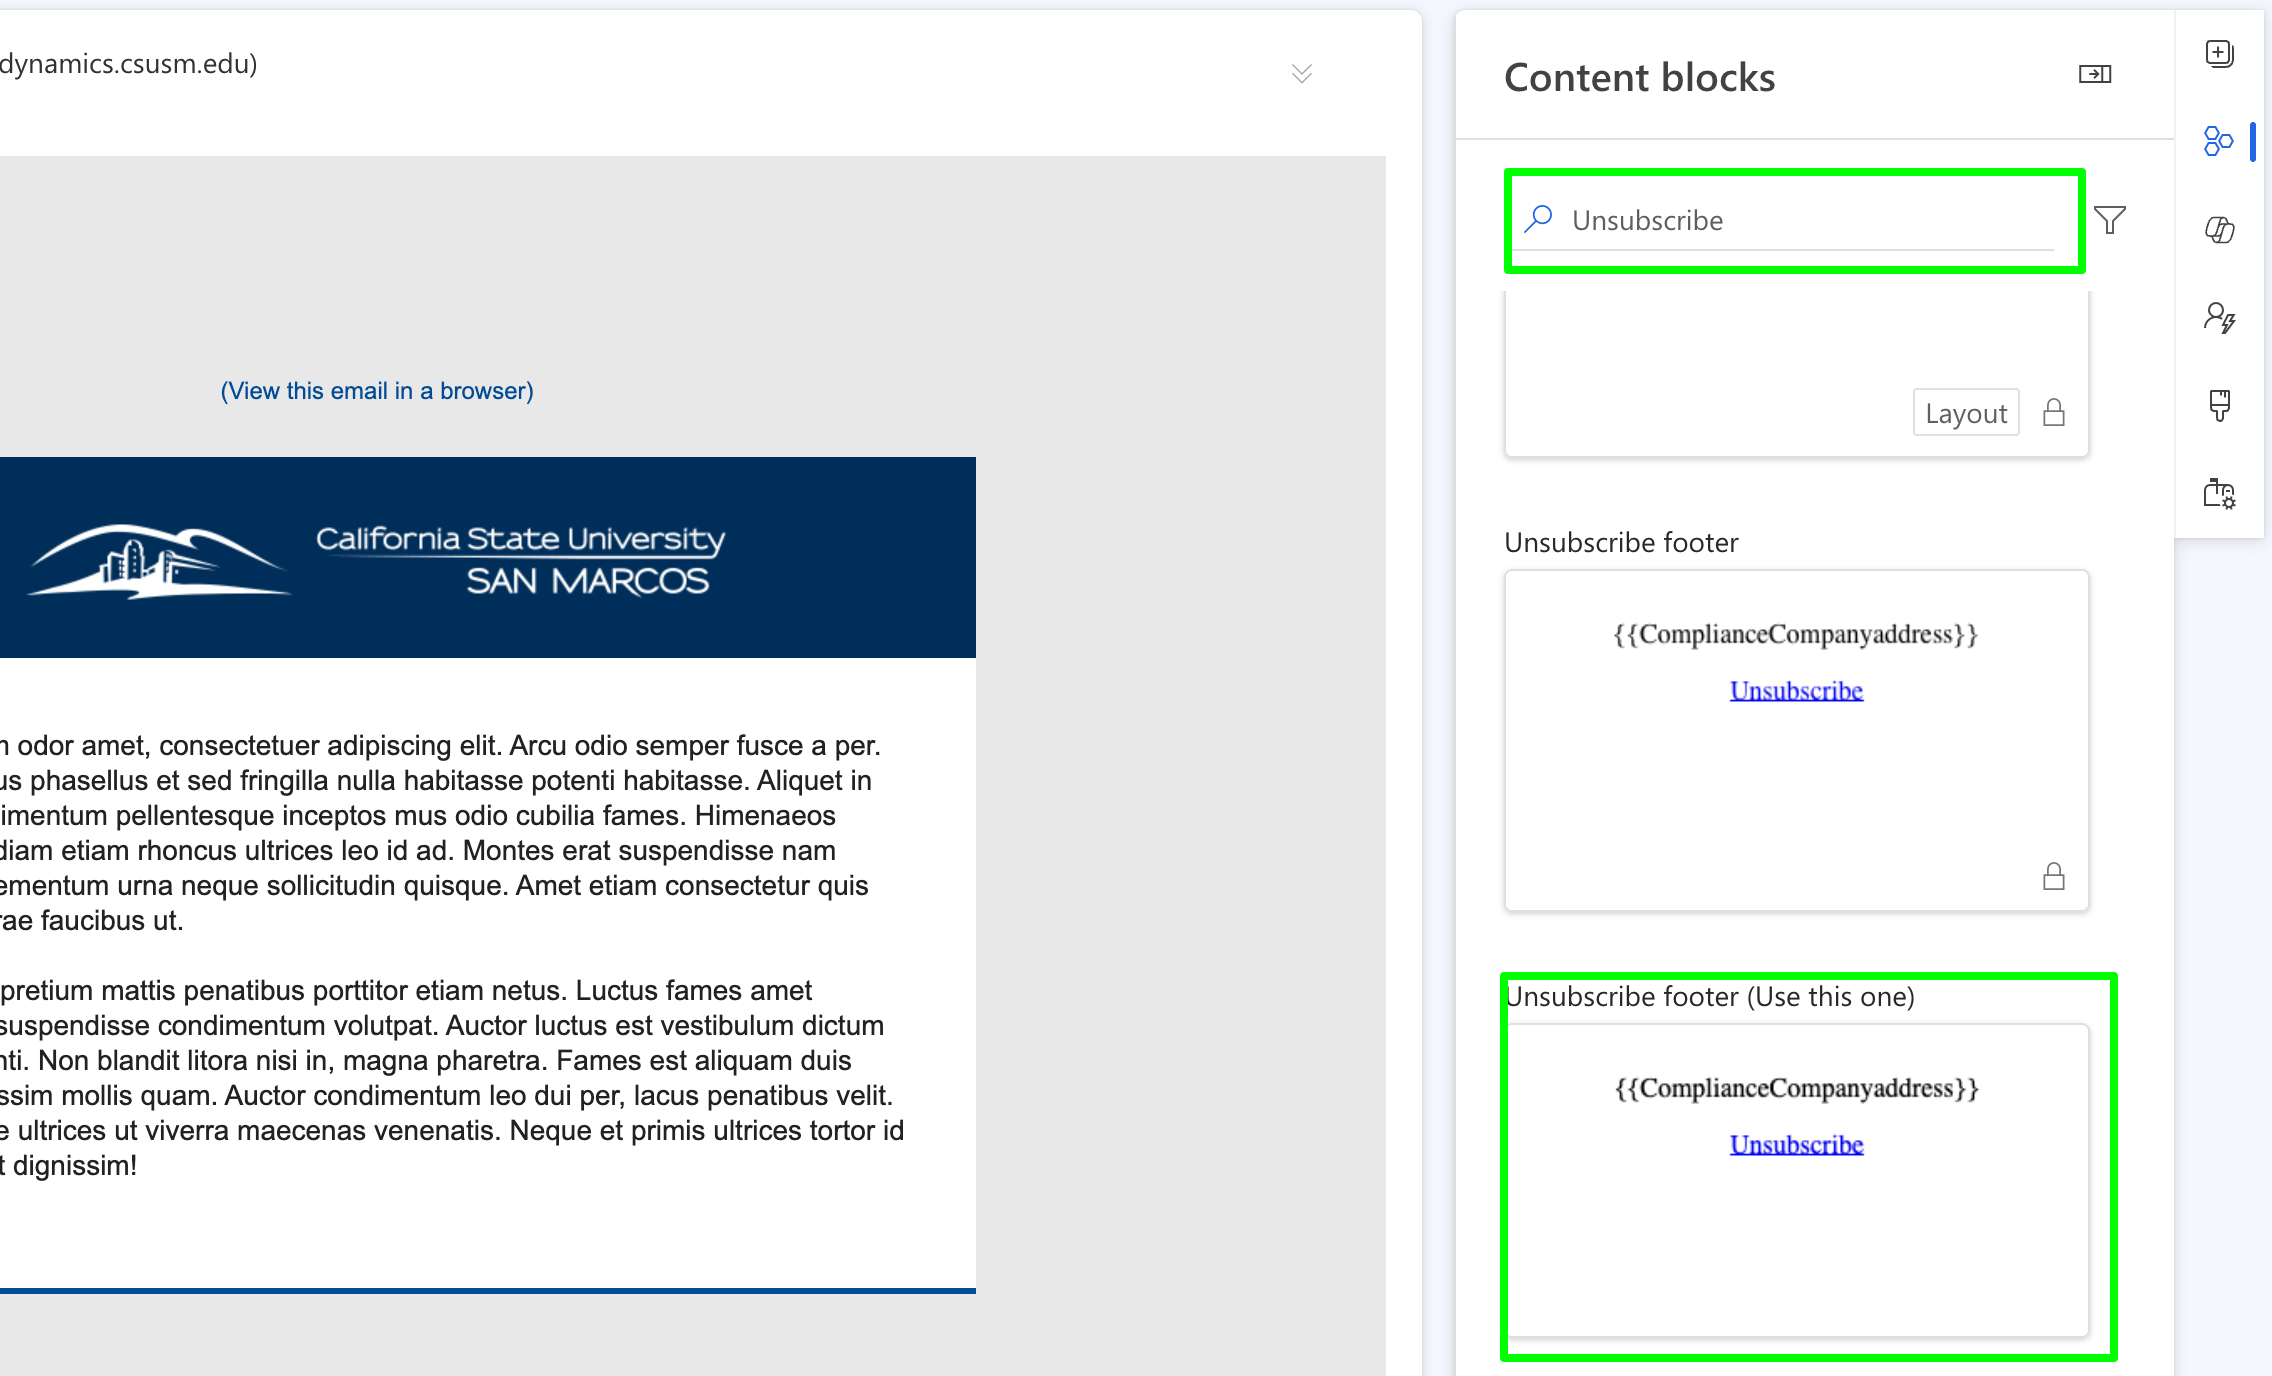
- On the right-hand side of your screen, locate the Content Blocks option by clicking on the icon with 3 hexagons to open it.

Step 4: Search for the Unsubscribe Block
- Use the search bar in the Content Blocks panel and type Unsubscribe.
- Find the block titled "Unsubscribe footer (Use this one)".

Step 5: Add the Unsubscribe Block
- Click on the unsubscribe content block and drag it into the new column space you just created.
- The unsubscribe footer is already programmed and it will fill in on the official send. You will not see it filled in on the testing phase.
- You’re all set!
 Return back to the Dynamics Hub

