Return back to the Dynamics Hub 
Step 1: Open Your Email
- Start by opening the email you want to add an image to.
Step 2: Add an Image
Option 1: Using the CSUSM-Approved Template
- Start with the CSUSM-approved template that already includes a full-width image.
- Click on the image to make the toolbar appear
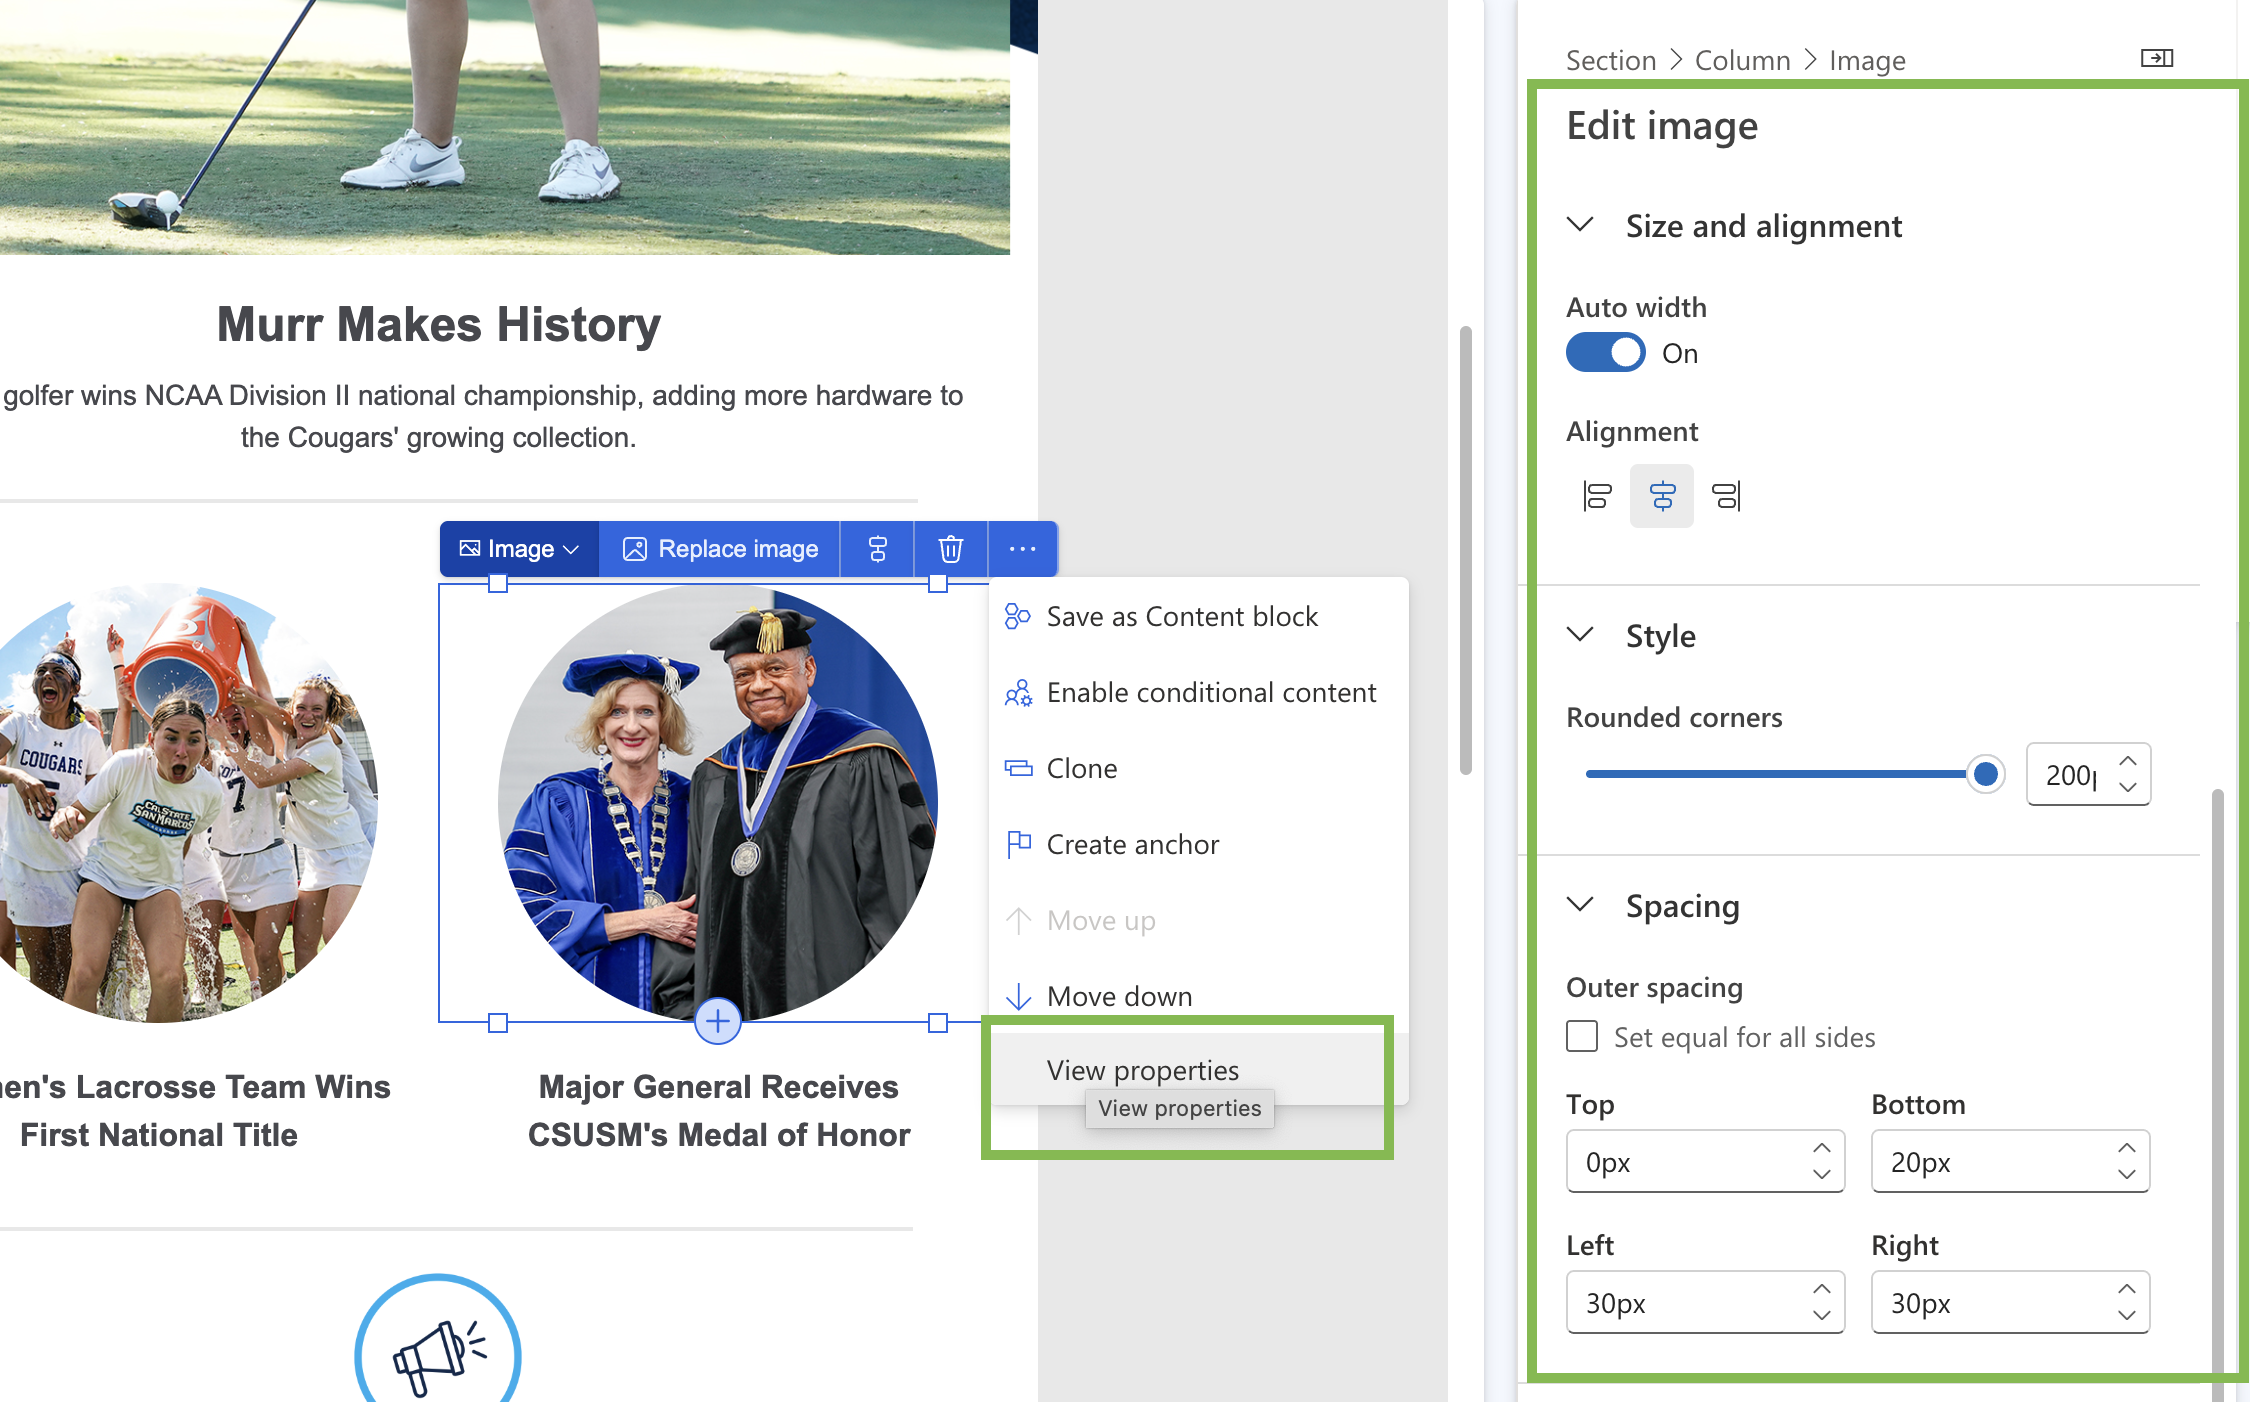
- When the toolbar pops up, click the ellipses (…) and select Clone.
This creates a copy of the header image in the email.
- Click on the cloned image, then click Replace Image in the toolbar.
- From there, you can either:
- Browse the library
- Upload a photo
Option 2: Using the Elements Panel to add a new image widget
- If you want to add a completely new image, follow these steps:
- Look for the Elements Panel on the right-hand side (icon with a + inside boxes, most likely the first option).
- Open the panel, find the Image Component, and drag it to the area of the email where you want to place the image.
- Click on the center of the new image block, and choose an image:
- Browse the library or upload a photo.
Step 3: Adjust the Image Settings
- If the image is not full-width and you can adjust its size or spacing:
- Click on the image to open the Edit Properties panel on the right.
- Adjust the following:
- Outer Spacing: to fix top or bottom spacing, or increase it to add space around the image.
- You can also:
- Adjust the width or height if needed
- Alignment: Center, left, or right-align the image
- Corners: Round the corners if needed

Step 4: Add Alt Text for Accessibility
- Once the image is added, always include Alt Text to make your email accessible to everyone, including screen readers.
Pro Tip: Alt Text is a short description of what the image shows. Example: For a group of students in CSUSM swag celebrating, use: "Group of students wearing CSUSM gear and celebrating." If the image is purely decorative, you can skip the alt text.
Step 5: Save Your Changes
- Don’t forget to click Save at the top right when you’re done!


